How do I add and edit Image elements?
Use an Image element to add visual assets to a screenshot. You can upload your own image files, such as photos, logos, graphics, illustrations, SVGs or badges, or choose from AppScreens assets such as Scribbles & Doodles, Store Badges & Icons, Backgrounds and Unsplash images.
Image elements are different from raw app UI screenshots. Raw app UI screenshots are managed in App Screens and are usually displayed inside Device elements.
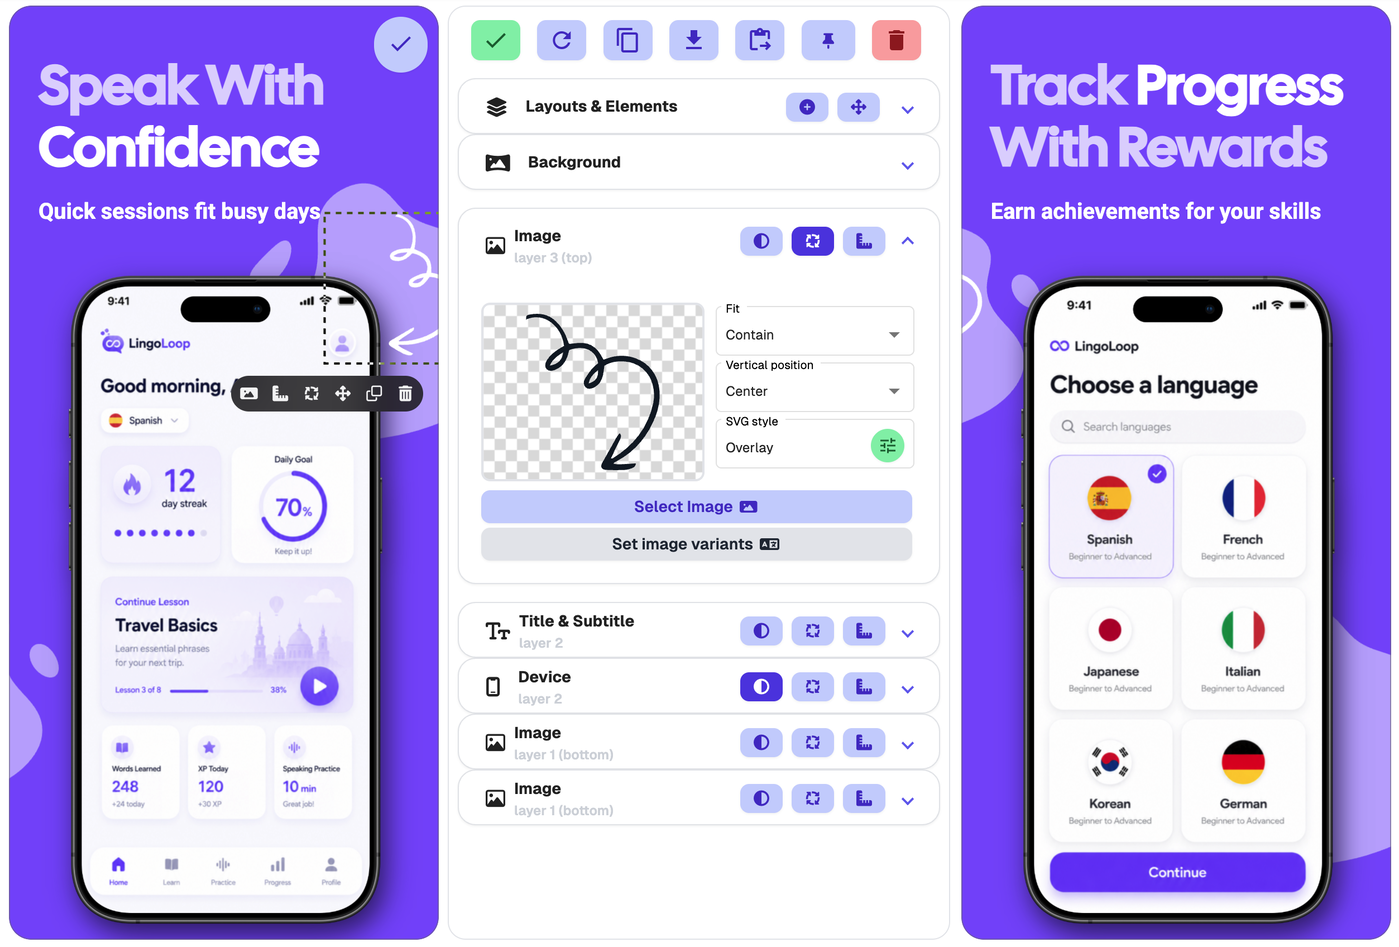
Open the Image tab
To edit an Image element, click the image directly on the screenshot.
This opens the Image tab in the edit panel.
You can also click the Image tab in the edit panel manually. If the image is hard to select because it is behind another element or partly off the screenshot, use Layouts & Elements to find and manage it.
Add a new Image element
To add a new Image element:
Click the screenshot you want to edit.
Open Layouts & Elements in the edit panel.
Click Add element.
Choose Image.
Click Select Image to choose or upload an image.
You can also use the + icon beside the Layouts & Elements heading to add a new element.
Choose or upload an image
In the Image tab, click Select Image to choose the main image for this Image element.
You can upload your own image file, or choose from the image browser.
From the image browser, you can use:
Upload
Upload your own image by dragging, dropping, pasting or clicking to upload.
Your Images
Choose from images, screenshots and backgrounds you have uploaded before.
Scribbles & Doodles
Choose from hand-drawn arrows, blobs, callouts, lines, waves, shapes, sparkles and doodles.
Store Badges & Icons
Choose from store badges, app icons, logos and popular image elements.
Backgrounds
Choose from reusable design backgrounds, gradients, waves, blooms and backdrop-style assets.
Unsplash
Browse photo collections when you need a sourced image.
Use Set image variants when this Image element needs to show different images for a specific language, store or output size. If the same image should be used everywhere, Select Image is usually enough.
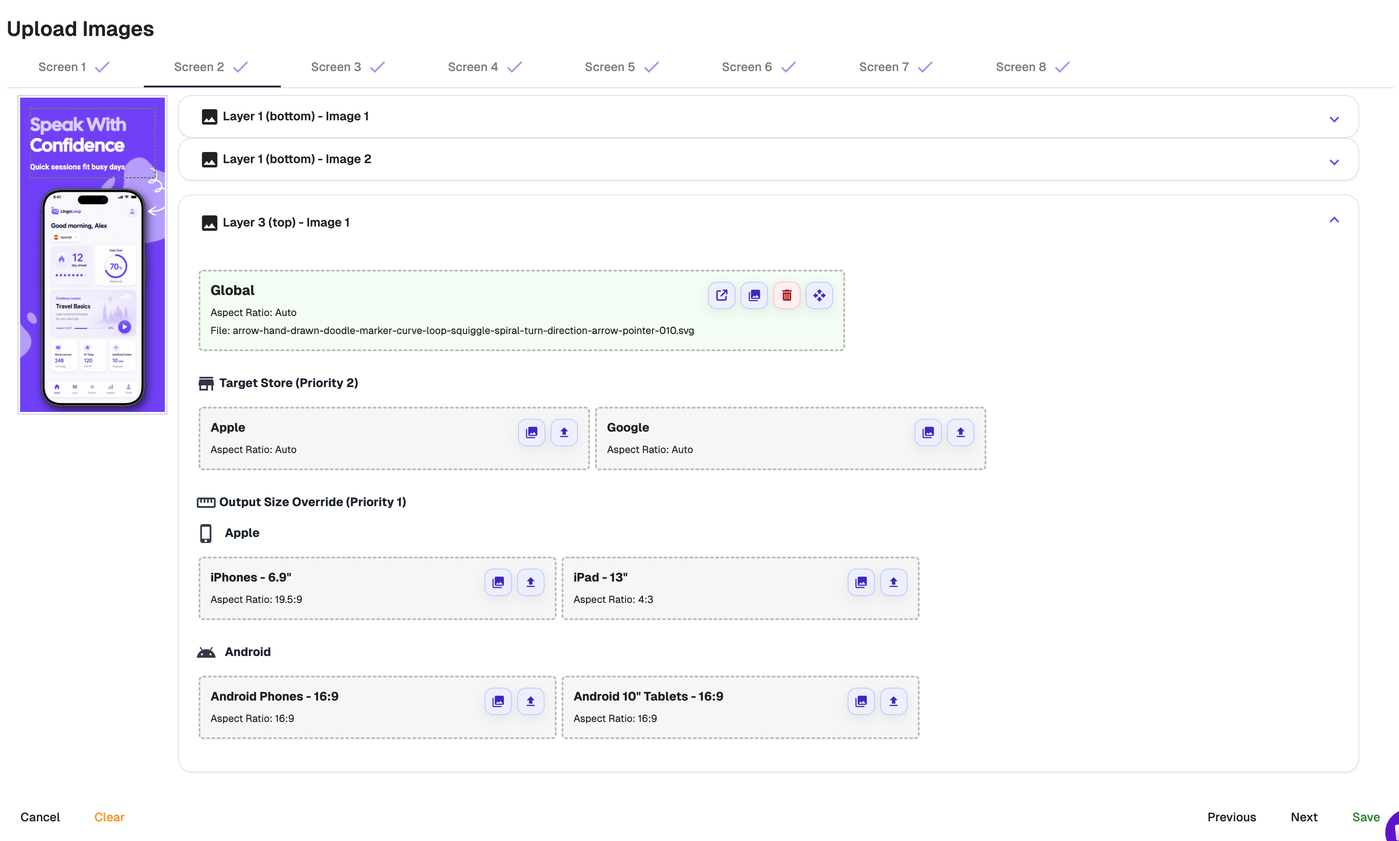
Set image variants
Use Set image variants when an Image element needs to show different images depending on the language, platform or output size.
This is useful when an image contains text, needs to change for Apple vs Google, or should be different for phone and tablet outputs.
Each variant can use an image you upload yourself or an image already available in AppScreens.
To set image variants:
Click the Image element on the screenshot.
Open the Image tab in the edit panel.
Click Set image variants.
Choose the screen and Image element you want to update.
Upload or select the image for the target you want to customise.
Click Save when finished.
You can set images at different levels:
Global
Use this when you want the same image everywhere.
Target Store
Use this when you want a different image for Apple or Google.
Output Size Override
Use this when you want a different image for a specific output size, such as iPhones, iPad, Android Phones or Android Tablets.
Language
Use this when you want a different image for a specific language.
If you do not need different images by platform, output size or language, use a single Global image.
Upload your own image files
You can upload images in several ways:
upload a file from your device
drag and drop an image into the uploader
paste an image into the uploader
click to browse and select a file
reuse an image you have already uploaded to AppScreens from Your Images
After uploading or selecting the image, save your changes to refresh the project.
Language-specific images
If your project uses multiple languages, you can use Set image variants to upload a different image for each language.
This is useful when the image contains text or needs to be localised for different markets.
Use Scribbles & Doodles
Scribbles & Doodles are built-in SVG-style graphic assets that sit inside an Image element.
AppScreens includes 500+ Scribbles & Doodles, including:
arrows
blobs
callouts
lines
waves
shapes
sparkles
Use these when you want to add callouts, arrows, highlights, playful marks or decorative details to a screenshot.
You can customise many Scribbles & Doodles from the Image tab using styling options such as colour overlay, fill colour, stroke or border colour, and stroke width.
Scribbles & Doodles are different from Shape elements. Shape elements are separate editable elements such as rectangles, circles, triangles and lines. Scribbles & Doodles are selected and edited as Image elements.
Add SVGs
You can upload SVG files and use them as Image elements in AppScreens.
SVGs are useful for logos, icons, vector graphics, callouts, badges, UI overlays, arrows and decorative assets.
To add an SVG:
Add or select an Image element.
Click Select Image.
Upload your SVG file, or choose an SVG-style asset from AppScreens.
Open the Image tab in the edit panel to customise it.
Depending on the SVG, you can adjust styling such as:
fill colour
border or stroke colour
stroke width
This makes it easy to match SVG icons, logos, doodles, arrows, badges and decorative assets to your app’s brand colours.
Scribbles & Doodles are also added as Image elements. If you want editable geometric shapes such as rectangles, circles, triangles or lines, use a Shape element instead.
Use badges and icons
Use Store Badges & Icons when you want to add common badge or icon-style assets to a screenshot.
This can include store badges, app icons, logos and popular image elements.
After adding a badge or icon, you can move, resize, rotate or style it like other Image elements.
Make sure any trademarked or copyrighted badge, icon or logo is used in line with the owner’s licensing and usage rules. Read more here Apple trademarks & licencing & Google trademarks & licencing
Use background-style image assets
The image browser includes Backgrounds, which are reusable visual assets such as gradients, waves, blooms and backdrop-style images.
Add these as Image elements when you want an extra decorative background layer or visual effect inside a screenshot.
If you want to change the main screenshot background itself, use the Background tab in the edit panel instead.
Image Fit
Fit controls how the image sits inside the Image element area.
Contain
Fits the image inside the height and width of the element area.
Cover
Scales the image to fill the element area by height or width, whichever is reached first. This may cause part of the image to overflow or be cropped.
Vertical Position
Use Vertical Position to control where the image is anchored inside the Image element area.
Options can include:
Top
Center
Bottom
If the image does not appear to move when changing vertical position, it is likely already filling the full element area. In that case, resize the Image element itself.
Move, resize or rotate an Image element
The quickest way to move or resize an Image element is directly on the canvas:
Hover over the image on the screenshot.
Click the move icon in the small toolbar that appears.
Move, resize or rotate the image on the canvas.
Click Save positions or the green tick when finished.
You can rotate an Image element by using the rotate handle in drag-and-drop mode, or by clicking the rotate icon next to the Image heading in the edit panel.
If the image is hard to select, use Layouts & Elements to find it and enter drag-and-drop mode from there.
Use Exact Dimensions for precise placement
Use Exact Dimensions when you want precise control over an Image element’s position, size or spacing.
You can open Exact Dimensions by clicking the right-angle ruler icon beside the Image element, or by clicking Exact Dimensions inside Layouts & Elements.
For an individual Image element, you can adjust values such as:
X position
Y position
width
height
spacing above or below the element
You can use Percent or Absolute values for an individual element.
Shadow
Use Shadow to add depth to an Image element.
This can help images, badges, icons or doodles stand out from the background.
Unsplash licence
Unsplash images can be used for free for commercial and non-commercial purposes.
You do not need to ask permission from, or provide credit to, the photographer or Unsplash, although credit is appreciated where possible. See more; https://unsplash.com/license
Good to know
Image elements give you flexibility across your screenshot set.
You can use one global image everywhere, or customise images by language, store and output size when you need more control.
Use Image elements for visual assets such as graphics, SVGs, badges, icons, doodles and background-style images. Use App Screens when you need to upload or replace raw app UI screenshots shown inside Device elements.