How to change your display device
The display device is the phone, tablet or computer frame your app screenshots sit inside. Every Output Size starts with a default display device chosen by AppScreens. For example, iPhone with Dynamic Island (medium) uses the iPhone 18 Pro 6.3".
You can change it in two ways:
For a whole Output Size. Every screenshot in that Output Size uses the new device. This is what most people need.
For one screenshot only. For example, the iPhone Duo inner display on one screenshot and the outer display on the rest.
We don't recommend changing the devices preset for Apple Output Sizes, other than the suggested options, as your app may be rejected for using the wrong device. For Google Play and Android, choose the Android device you can most easily take screenshots on. See a list of all the devices AppScreens has here.
Method 1: Using an AI agent
If AppScreens is connected to your AI agent, tell it what you want. For example:
"Use the Samsung Galaxy S26 frame for Android Phones."
"Show the iPhone Duo inner display on screenshot 2 only."
The agent updates the same project, so you can check the result in the Designer. See Can I create screenshots with an AI agent?
Method 2: Change the device for a whole Output Size
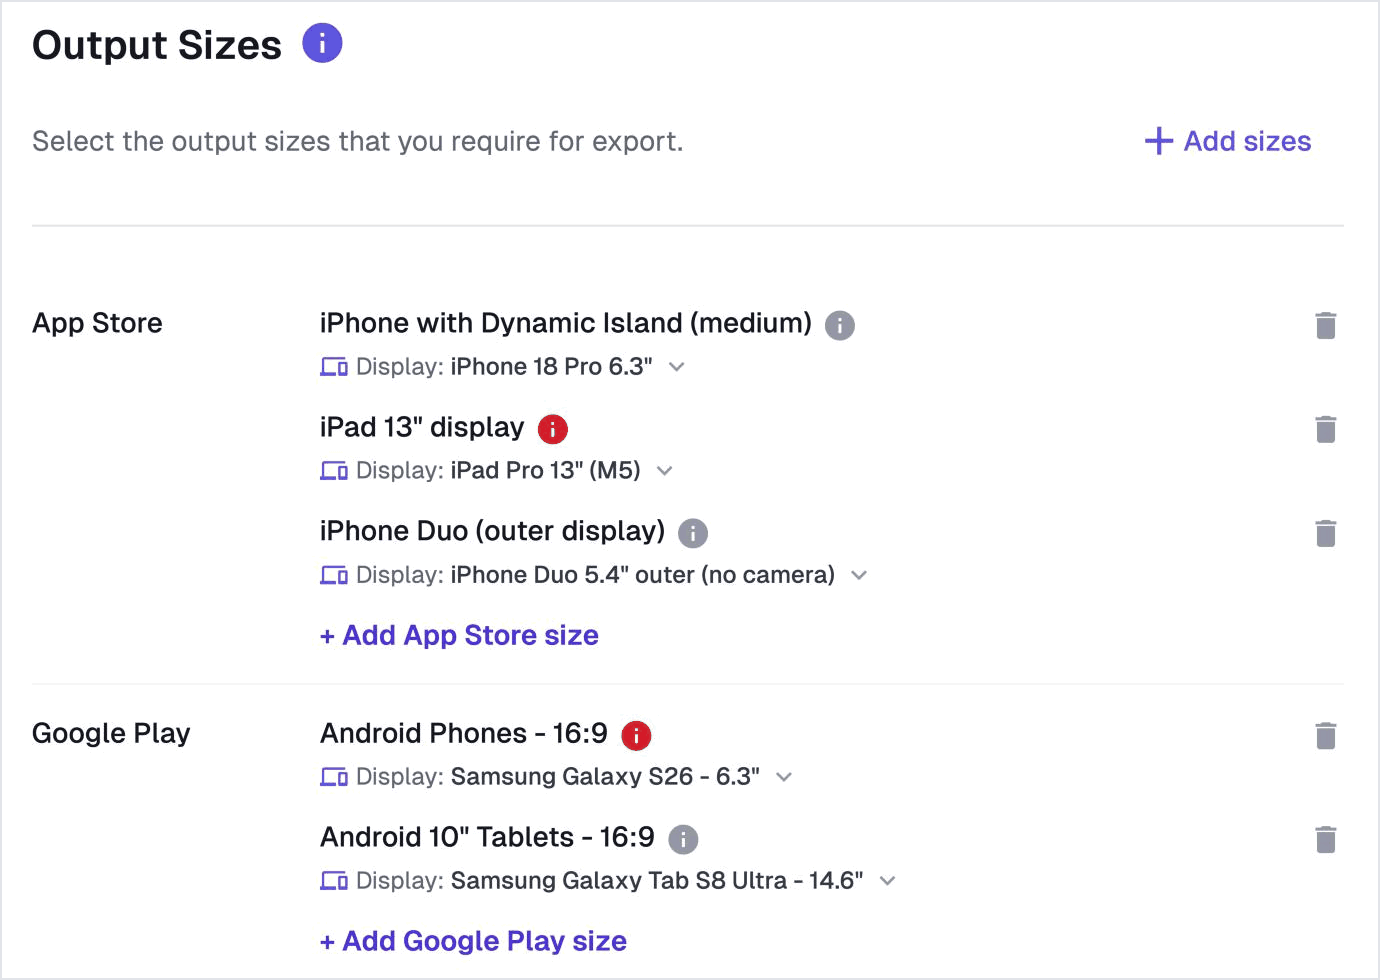
Click Project Setup in the Designer top toolbar and open the Output Sizes tab.
Under the Output Size, click Display: followed by the device name.
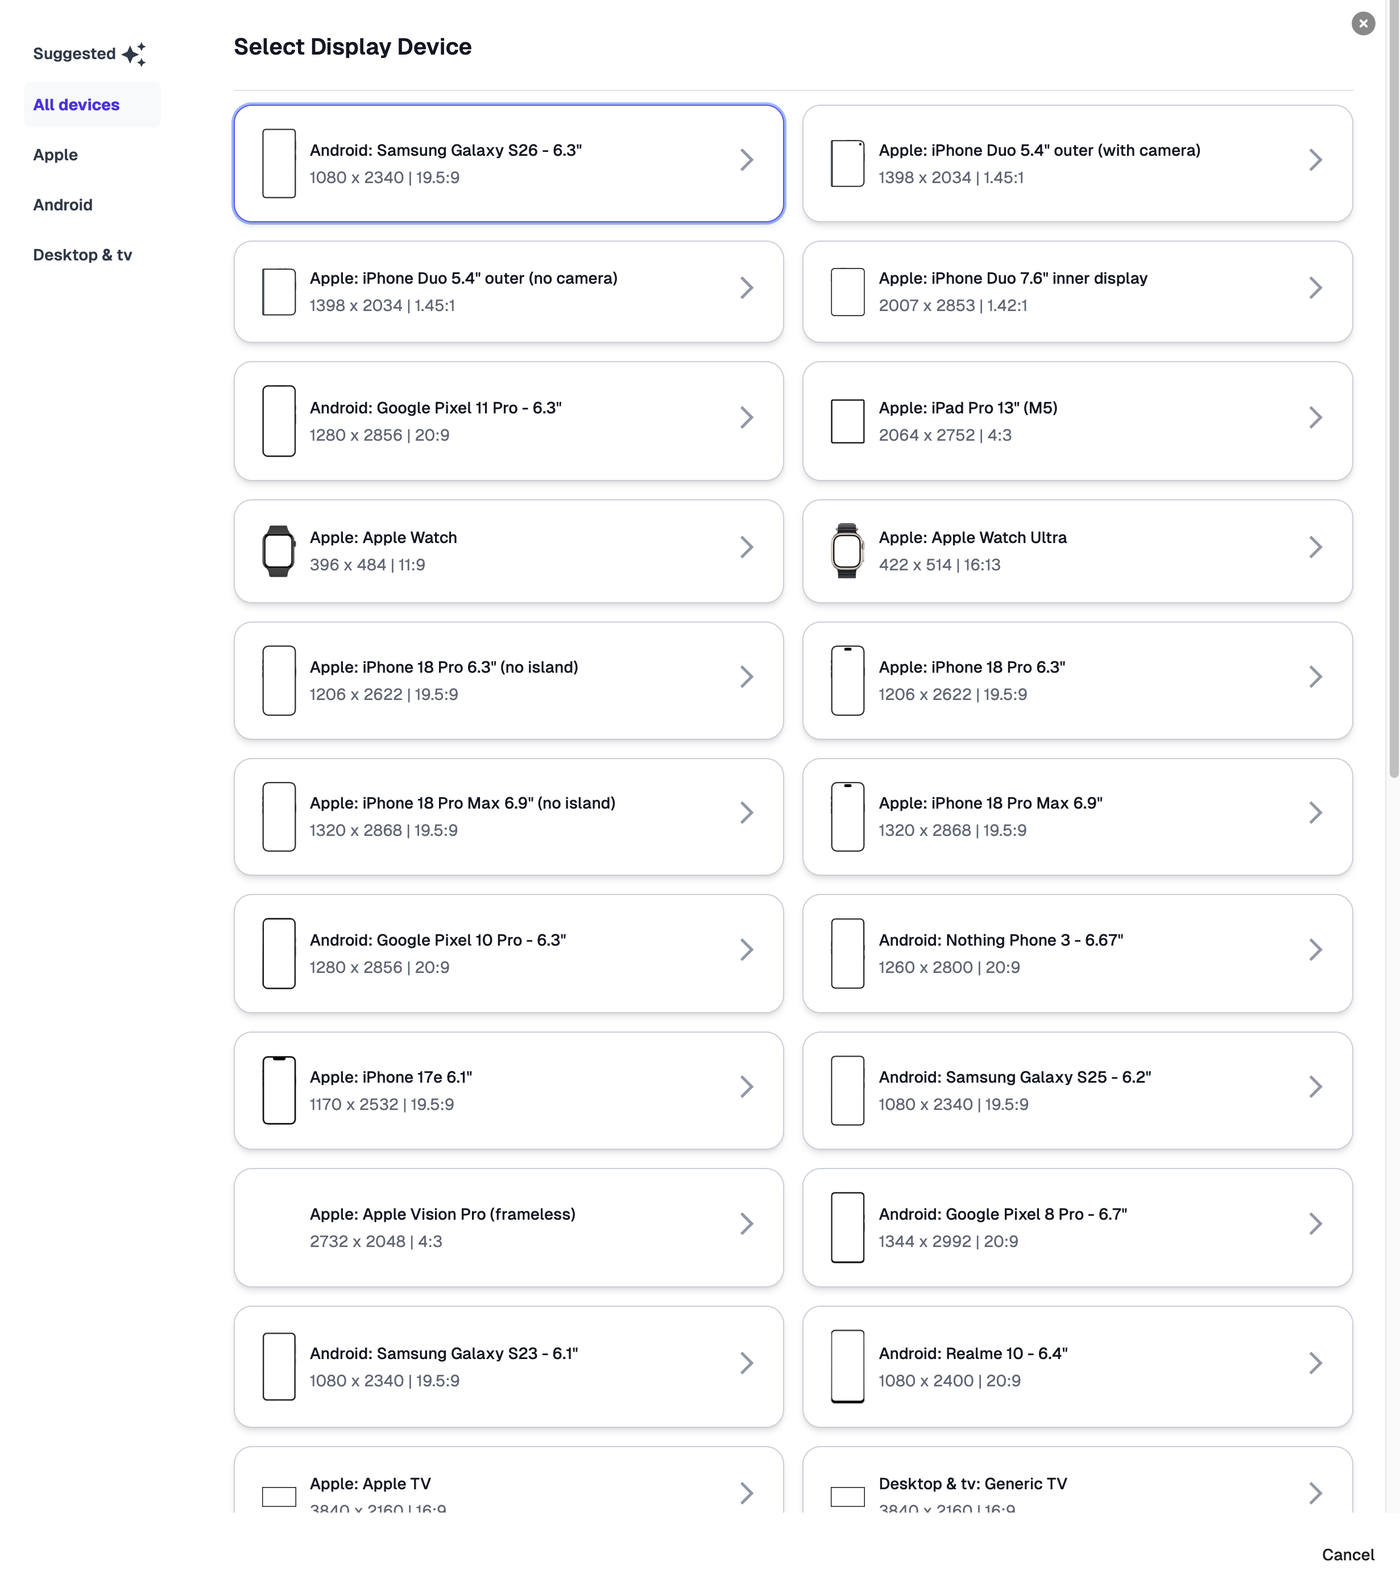
Select a new display device, then click Update.
Method 3: Change the device in the Designer
Select the Output Size you want to change in the Output Size dropdown in the top toolbar.
Click the device on the screenshot you want to change. This opens the Device settings.
Click Change device. You'll see three numbered options.
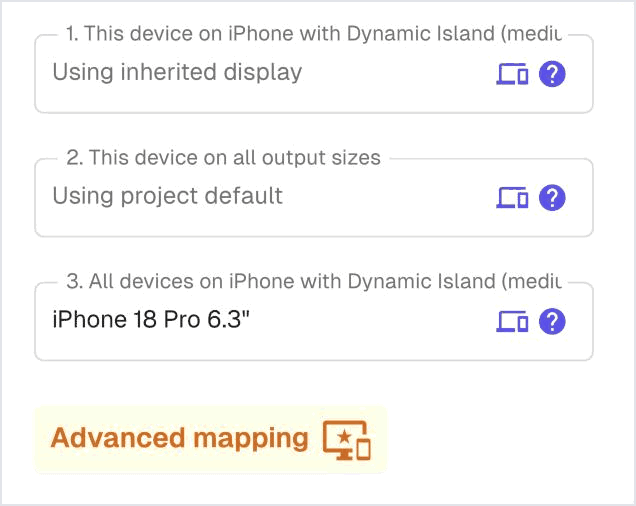
1. This device on [Output Size]
Changes only this device, only on the Output Size you're viewing.
When to use it: your project uses the iPhone Duo (outer display) Output Size, but on one screenshot you want to show the inner display. Select that screenshot's device and use 1. This device on iPhone Duo (outer display) to pick the inner display.
2. This device on all output sizes
Changes only this device, on every Output Size.
When to use it: you want screenshot 5 to show a watch, to show your app works on watch too. Use option 2 to pick the watch, and that one device on screenshot 5 shows as a watch on every Output Size.
3. All devices on [Output Size]
Changes every device on every screenshot in the Output Size you're viewing.
When to use it: you want a different frame for a whole Output Size, for example a different Android phone for Android Phones - 16:9. This is the same as changing Display in Project Setup (Method 2).
Click an option, pick a device and it's applied. To undo, open the same option and click Clear selection.
Which device is shown?
AppScreens uses the first option that's set, in order 1, 2, then 3. "Using inherited display" and "Using project default" mean that option isn't set, so the next one is used. If you change or clear option 2, AppScreens asks before clearing this device's option 1 changes.
Advanced mapping
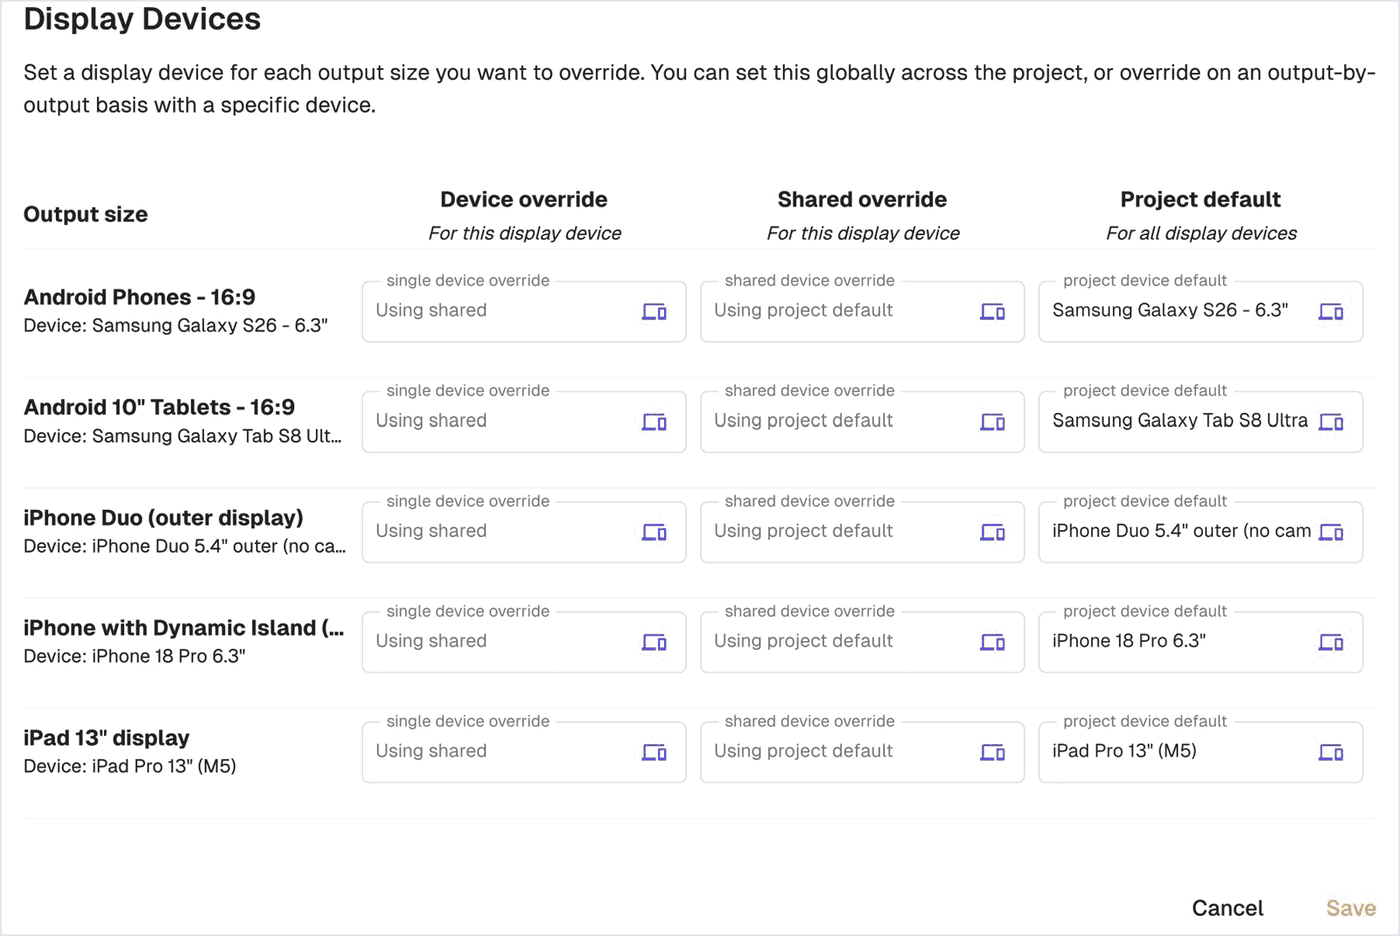
Click Advanced mapping to see this device on every Output Size in one table. Each row is an Output Size, and the columns match the three options:
Device override: option 1, this device on that Output Size.
Shared override: option 2, this device on all output sizes, so it shows the same value on every row.
Project default: option 3, all devices on that Output Size.
Click any field to change it, then click Save.