Setup your Output Sizes
Selecting Project Output Sizes
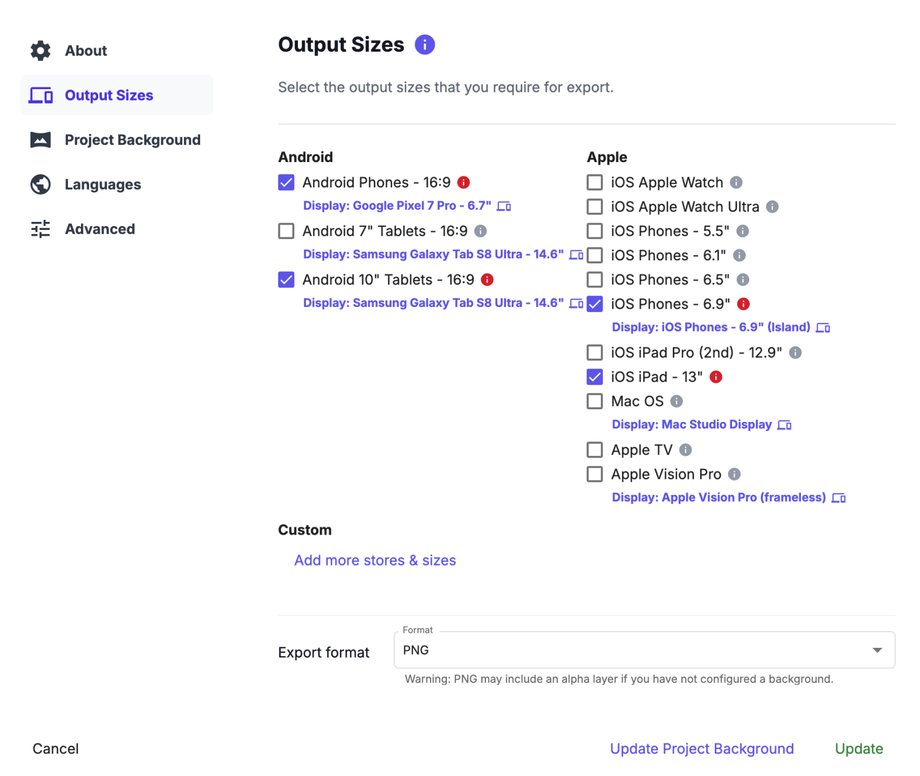
When starting a project, you will need to select the output sizes & display devices you require for your project.
For instance, if you are starting a cross-platform iOS and Android phone-only app, you will select both iOS and Android sizes for phones. If you intend to design and and build for tablets too, select the tablet sizes required by both App Stores.
You can access the project setup by either creating a new project, or within your existing project by hitting Project Setup (settings cog icon) in the action bar and the clicking on the Output Sizes tab.
These output sizes are all set to an aspect ratio of 16:9 as recommended in Google Play's offical specifications. Within each of these output sizes, you will be required to select a display device to frame your screenshots within, there are over 10 to chose from.
Mac OS - Let's you pick from a MacBook Air or Mac Studio Display
Available Output Devices
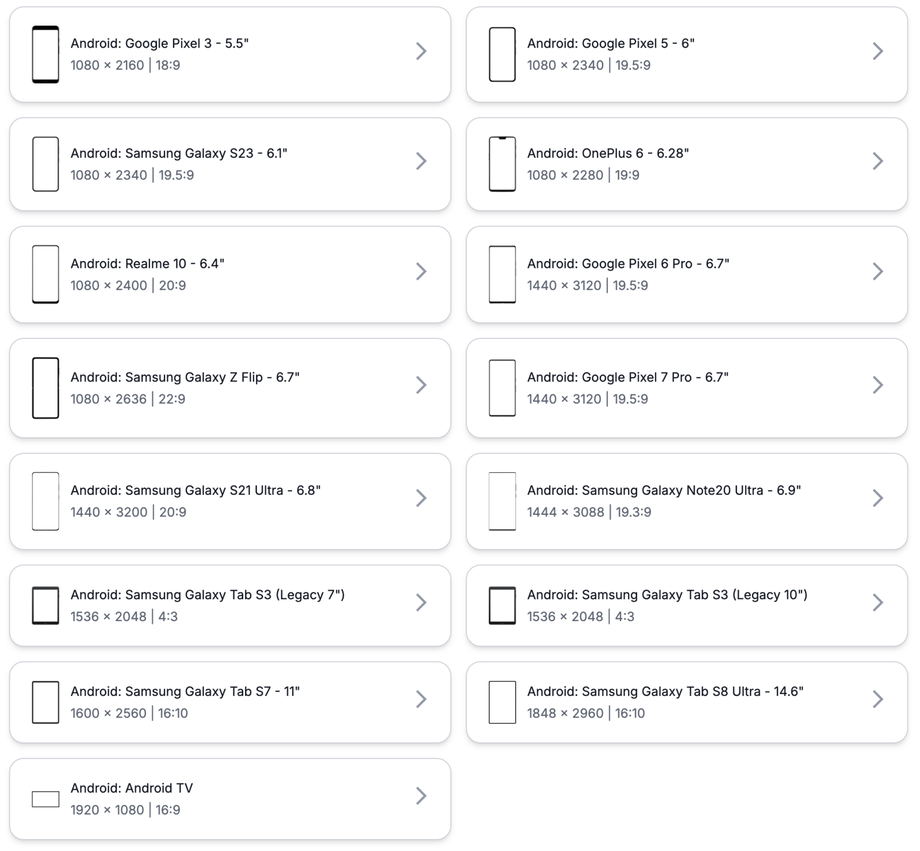
We have the following output devices available for you to choose from on AppScreens.
Apple
Android
Desktop & TV
Custom Output Sizes
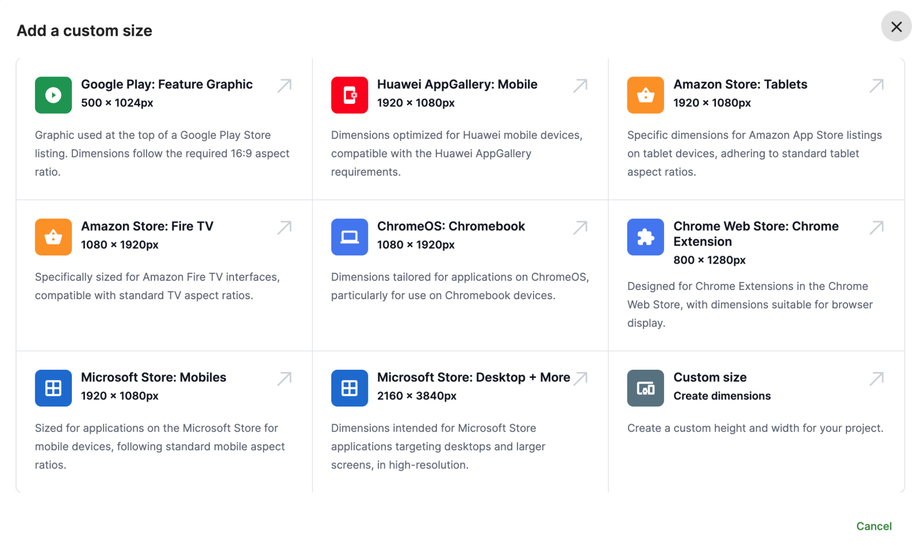
You can also create and add custom sizes to your project Under Custom, click on Add more stores & sizes.
You can select one of our pre-set sizes for the Google Play Feature Graphic & other app stores such as Huawei AppGallery, Amazon Store, ChromeOS, Chrome Web Store & Microsoft Store.
To create a Custom size, select the option then enter a Name, Width, Height & Display Device.
Apple & Google Specifications
You can find out more about Apple's screenshot specifications here
You can find out more about Google Play's screenshot specifications here


