How do I edit the Device element?
The Device element controls the phone, tablet or device frame shown on your screenshot.
Use the Device settings to change the device type, frame style, orientation, fit, position, rotation and shadow.
The raw app UI screenshot shown inside the device is managed separately in App Screens. See How do I upload raw app UI screenshots? for help uploading or replacing those images.
Open the Device settings
To edit a Device element, click the device directly on the screenshot.
This opens the Device tab in the edit panel.
You can also click the Device tab in the edit panel manually. If the device is hard to select because it is behind another element or partly off the screenshot, use Layouts & Elements to find and manage it.
Device Type
Use Device Type to choose the style of device shown on your screenshot.
Options can include:
Dynamic Frame — choose the frame colour, padding colour and frame width
Flat Device Mockup — flat mockup styles such as real dark, real light, real gold, matte light or matte dark
3D Device Mockup — angled 3D mockups facing right or left
Screenshot only — show the app UI without a full device frame
3D Screenshot — show the app UI in an angled 3D style
Device Orientation
Use Device Orientation to choose how the device is displayed.
Options include:
portrait
landscape left
landscape right
Device Fit
Device Fit controls how the device sits inside the Device element box.
Contain
Fits the device within the height and width of the element box.
Cover
Sizes the device to cover the element box. This may cause it to overflow in one direction.
Vertical Position
Use Vertical Position to position the device inside the element box.
Options include:
top
centre
bottom
If changing the vertical position does not appear to move the device, the device may already be filling the available element space. In that case, resize the Device element on the canvas or use Exact Dimensions for more precise control.
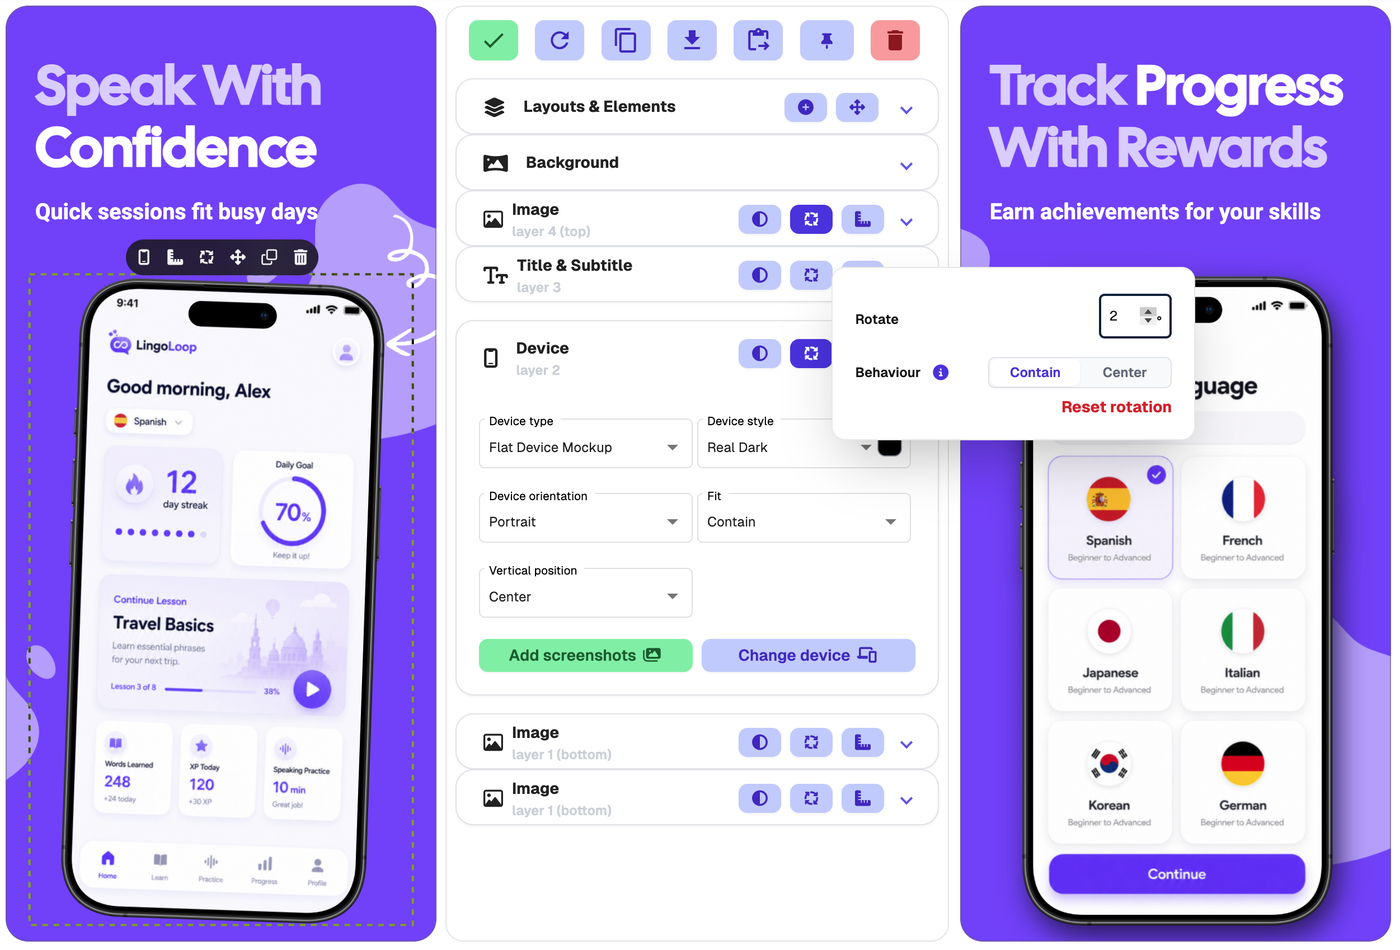
Rotation
Use Rotation to rotate the Device element.
You can rotate it in two ways:
Open the Device tab in the edit panel and click the rotate icon next to the Device heading.
Enter drag-and-drop mode and use the rotate handle above the selected device.
You can also reset the rotation if you want the device to return to its original angle.
Rotation is useful when you want a more dynamic layout, such as an angled phone mockup or a more playful screenshot design.
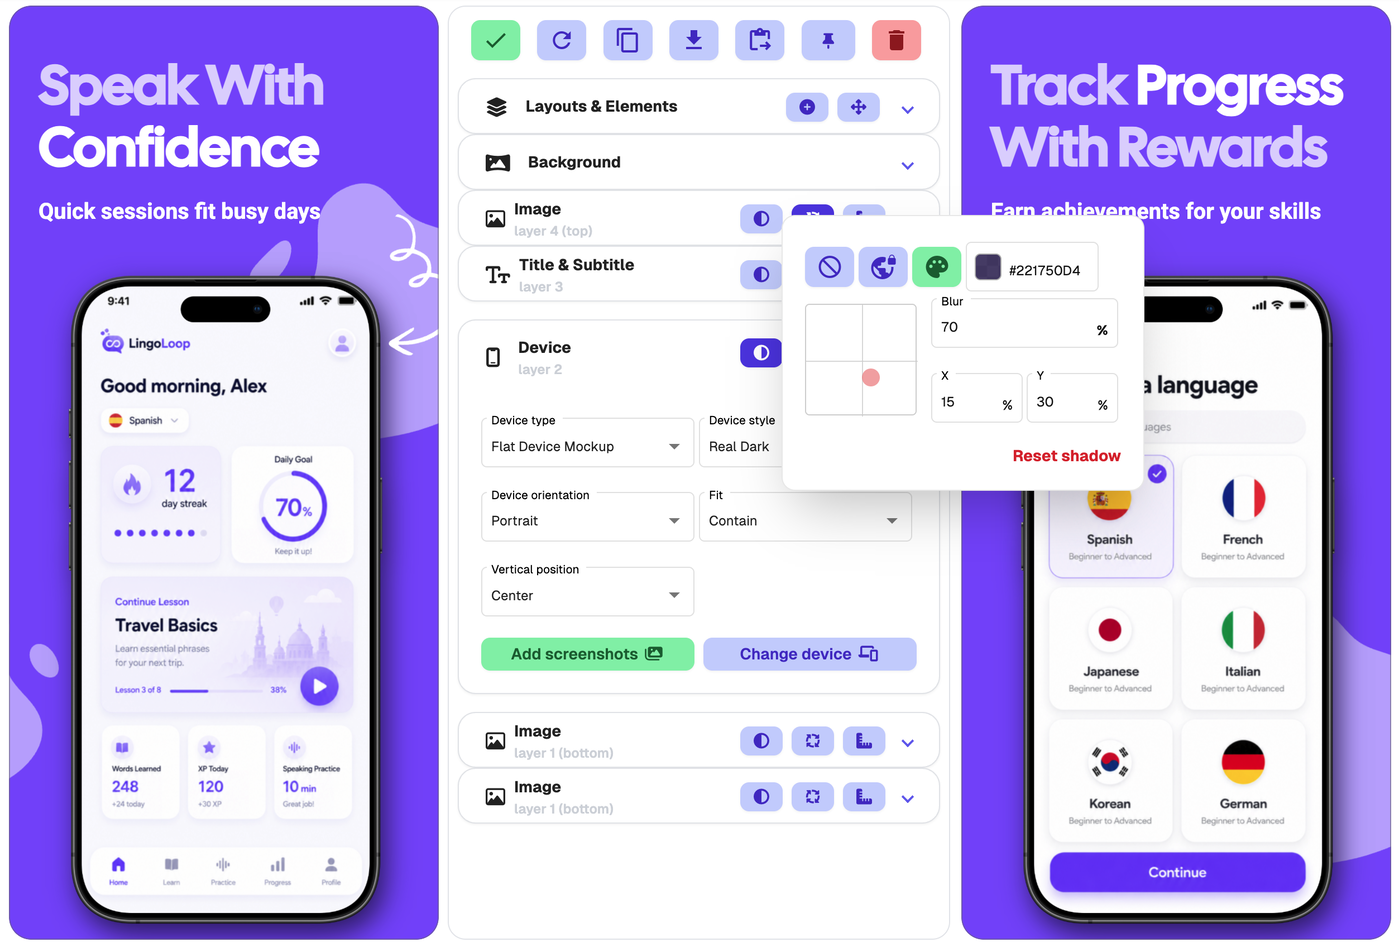
Shadow
Use Shadow to add depth to the device.
A subtle shadow can help the device stand out from the background.
Edit Device
Use Edit Device to change the display device for the output size you are viewing.
This is most useful for Android outputs and custom outputs.
Be careful when changing devices for Apple output sizes. App stores may reject screenshots that use the wrong device for the selected output size.
Move or resize the Device element
The quickest way to move or resize a device is directly on the canvas.
Hover over the device on the screenshot.
Click the move icon in the small toolbar that appears.
Move or resize the Device element on the canvas.
Click Save positions or the green tick when finished.
If the device is hard to select because it is behind another element or partly off the screenshot, open Layouts & Elements and use one of the drag-and-drop options from there.
For precise placement, click the right-angle ruler icon beside the Device element to open Exact Dimensions.
Upload or replace the raw app UI screenshot inside the device
The Device element displays a raw app UI screenshot from your project.
To upload, replace or reorder those raw app UI screenshots, go to App Screens.
For more help, see How do I upload raw app UI screenshots?