Image Element
Use the Image element to upload and add your own custom image files, including photos, logos, badges, and graphics, to your screenshot. We also integrate with Unsplash providing over 5 million images.
Add images to your Image element
In the designer, click on your Image element and click Select images.
This opens the Upload Images screen, where you can add images per:
language
Target Stores such as Apple and Google
Output sizes such as iPhone, iPad, Android Phone, and Android Tablet
If you want to use the same image everywhere, you can upload a single Global image instead of adding separate images for every platform, output size, and language.
How to upload images
You can upload images in a few different ways:
upload your own custom image files directly from your device file manager
drag and drop an image from your file manager onto its matching target box
click a target box to browse your device and upload an image
if you already uploaded the image to AppScreens, click the image icon and select it from your AppScreens file manager
You can also reuse the same image across other targets and output sizes. To do this, click the Move icon and drag and drop the image to another device or target box.
Once your images have been uploaded, click Save to close the uploader and refresh your project.
Language-specific images
If your project uses multiple languages, you can upload different images for each language.
Use the language dropdown in the top right of the Upload Images screen to switch between languages before uploading your images.
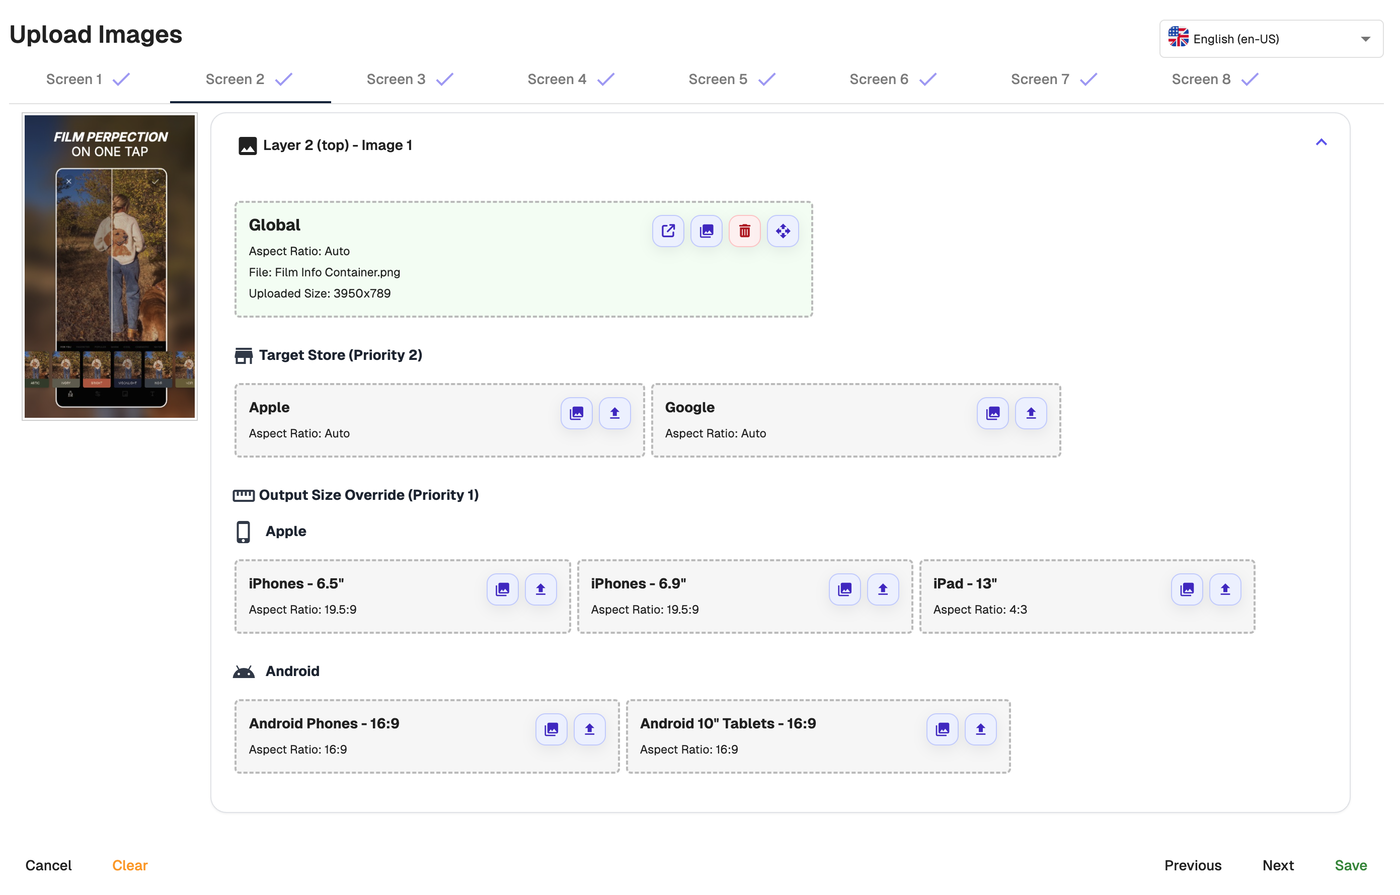
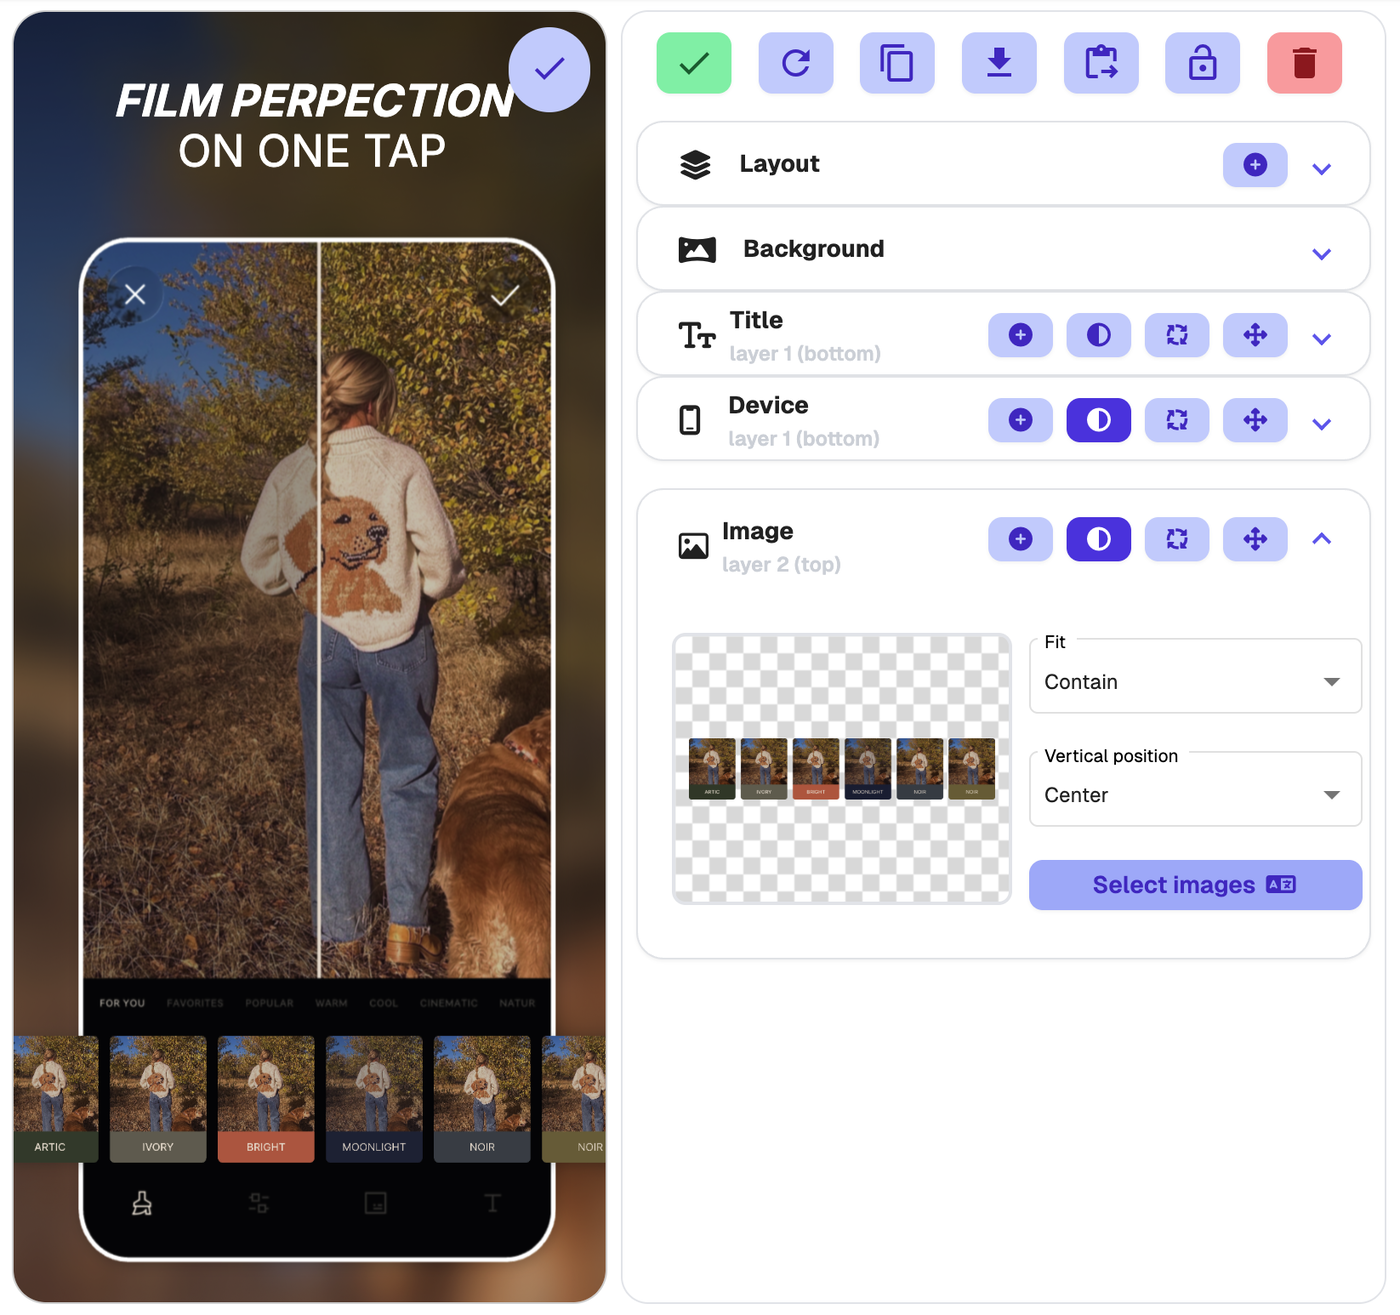
Image element properties
Fit
Contain - Fits the image inside the height and width of the element box.
Cover - Scales the image to fill the element box by height or width, whichever is reached first. This may cause the image to overflow the box.
Vertical Position
Choose Top, Center, or Bottom to position the image inside the element box. This sets where the image is anchored within the available space.
If your image does not appear to move, it is likely already filling the full element area. In that case, you will need to adjust the size of the image element itself.
To do this, either:
click the Move icon and edit the element properties
open the screen’s Layout tab and click Edit layout to use the Layout Designer
Image Rotation and Shadow
You can rotate your image and apply a shadow to give it more depth. In the side edit panel, against the image element, click on the shadow or rotation icons to adjust.
Convert a title element into an image element
You can also convert a Title element into an Image element.
To do this, click the orange Move icon in the element toolbar, then click Convert.
Good to know
The Image element gives you a lot of flexibility. You can use one global image across all outputs, or customise images per language, store, and output size when you need more control.
Unsplash Licence
Photos published on Unsplash can be used for free. You can use them for commercial and non-commercial purposes. You do not need to ask permission from or provide credit to the photographer or Unsplash, although it is appreciated when possible. See more; https://unsplash.com/license
Badges
You must use any of the trademarks and copyright material offered in accordance with the owners licencing and terms. Read more here Apple trademarks & licencing & Google trademarks & licencing