How do I change the size of my text title and subtitle?
AppScreens smartly uses positioning to create your project not only for the device you're viewing, but for every device you've selected to export your project to!
There are a couple of areas you need to check and look at to change the size of your title and subtitle.
Title & Subtitle Options
Open & drop down your Title and/or Subtitle element.
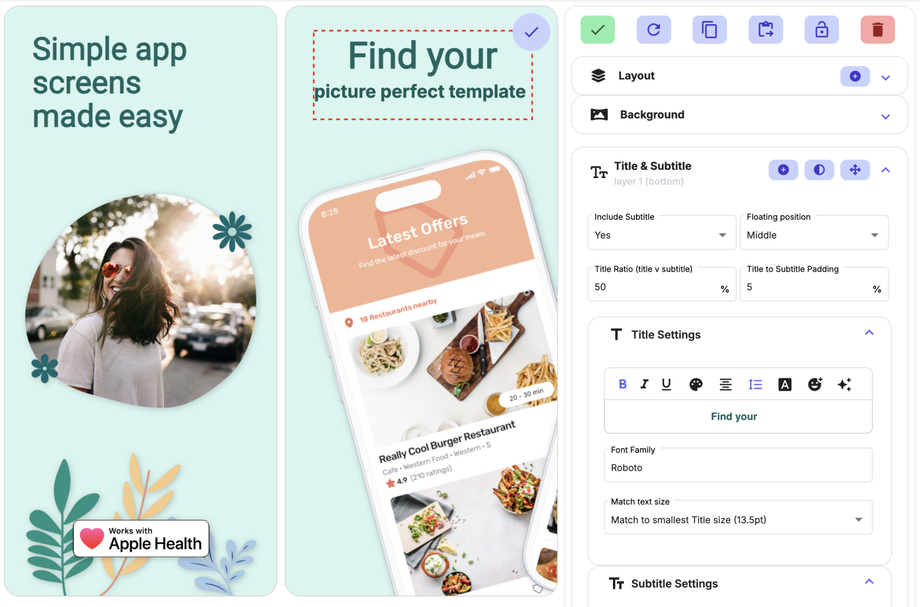
Include Subtitle: Only select Yes if you'd like to have a subtitle within your title element.
Floating Position: Select whether you'd like your text floating to the bottom, middle or top of your title element box.
Title Ratio (title v subtitle): The ratio your title holds vs the subtitle out of 100% within your title element. For example, if your title ratio is 70%, this means your title takes up 70% and the subtitle takes up 30% of the available space. The font size is automatically calculated from the available size of the box. If you want to limit the size, see Max Font Size.
Title to Subtitle Padding: How much padding / space is between your title and subtitle.
Match Size: Your selection here depends on how you want your screenshots to transpire across to your other devices.
- No - Manual Control - Used for when you do not want the title / subtitle to match the font size of the other titles in your project and you want to specify it's exact size. Useful for your first initial screen if you want a larger title as shown on the screenshot below. This is set by using Max Font Size - the maximum font size you want this specific title element to be across your project and different device sizes (you'll need to check this works across the varying device sizes within your project).
NOTE: Remember although you have set a max font size, it is a max, your title on this device size may be smaller because it is restricted to the title element space (the red dash outline shown) that is available to it as set in the layout designer, you will need to adjust the element itself to increase or reduce this (see below how). - Match to smallest Title size - AppScreens will automatically size your text to fit the available space in the title element across all screenshots set to 'Match to smallest Title size' across your whole project to ensure uniformity. We recommend using this setting in most cases.
Text Toolbar Settings:
Char Spacing: How much additional empty space you'd like to add between characters.
Line Height: The ratio out of 100% that your line holds compared to it's available space.
Multiline: You can choose to break text that is too long, or force a block of text onto a single line.
- Wrap - will move your title/subtitle onto a new line when it reaches its max width with the font size set.
- Single line - will keep all your title/subtitle on one line. If there are too many words within your element, AppScreens will reduce the font size to enable the whole title/subtitle to fit within the space allocated.
Title Element Layout
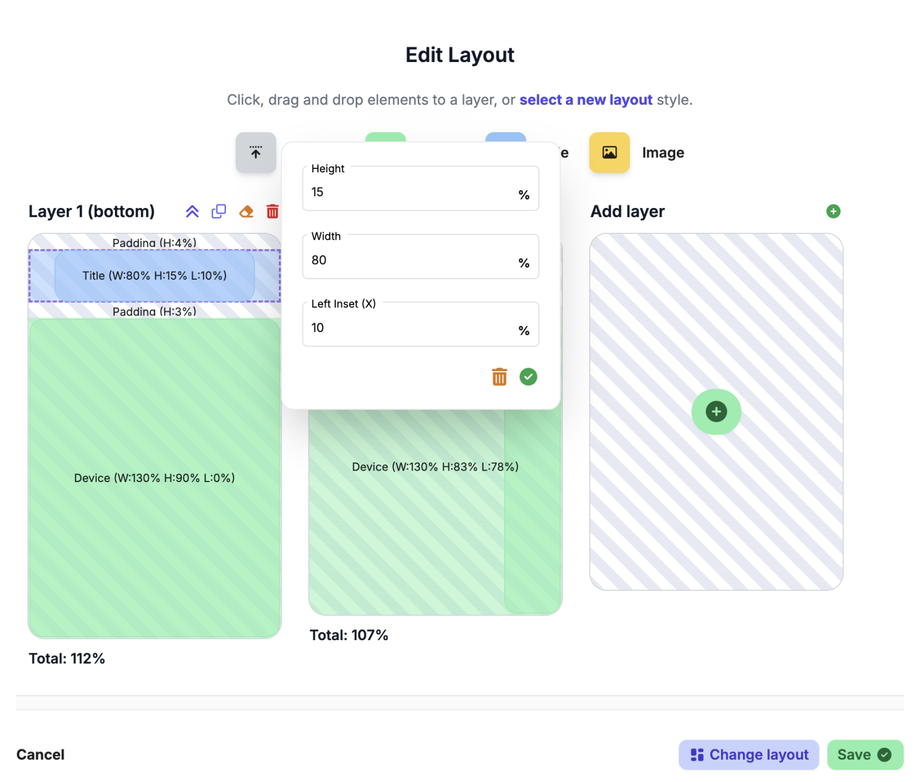
To get a clear picture of the positioning and layout of the elements (spacer, device, title, image) for your screenshots, you need to use the layout designer. This tool will enable you to move all elements around by changing their layer, position, top offset, height, width and left inset. To access the layout designer:
- Hover on the screen you want to edit
- Click on the circular blue edit icon in the top right corner of that screen
- Under the Background element tab
- Click the Edit layout button
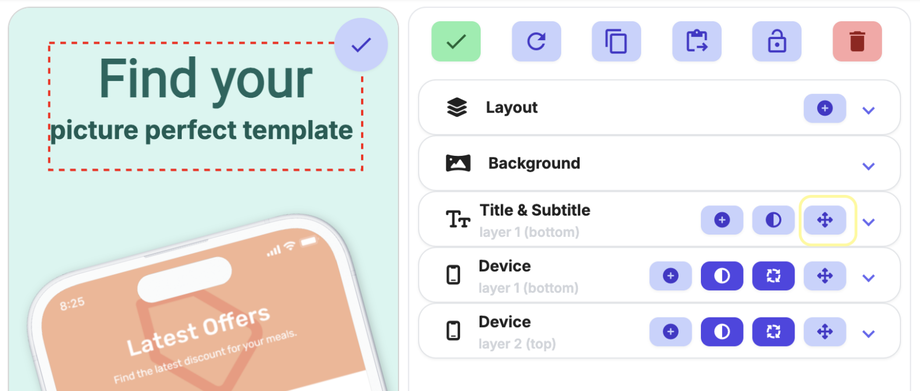
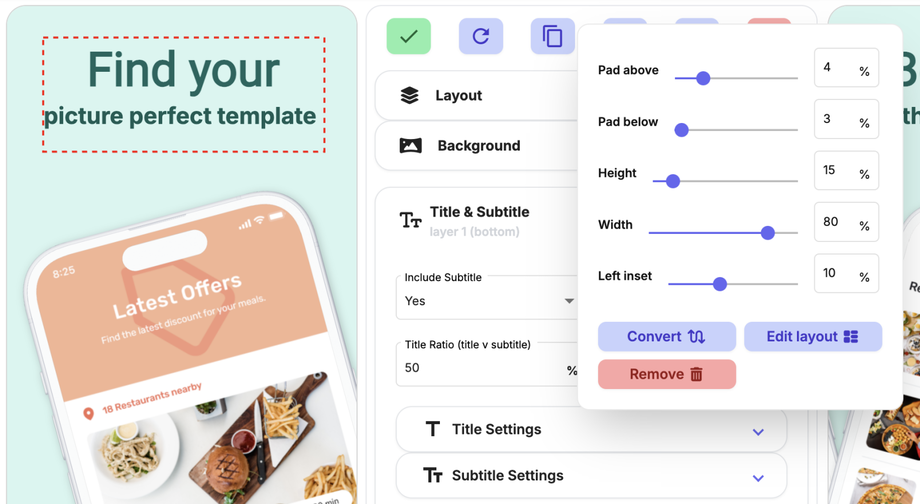
You can also edit an elements properties in the main designer screen. Click on the move icon on the element toolbar. Here you can edit the padding above/below the element, top offset, height, width and left inset.
Edit text element properties
Height %: Enter a percentage height for your element. This will be how much of the screen this element will take up, this is also how much space that element will have to sit within.
Width %: The width is how much the element will span across the whole width of the screenshot from edge to edge. Generally, we want elements to be positioned in the center of our screenshot and not touching the edges. We generally recommend a width of 80% for titles.
Left Inset %: 0% is the absolute left edge of the screenshot, 100% is the absolute right edge of the screenshot. If you make your text element a width of 80%, you will need to also ensure it has a left inset of 10% (10% for the left, 10% for the right) so that it sits in the center of your screenshot.


